OpenJDK调试
1. 导入项目
1.1 compile_commands.json
阅读C++代码时如果能够很方便地跳转到函数、类型定义处,会极大地提高效率。使用 grep 或 ctags 或 gtags 的问题在于给出的结果不够严谨,可能会给出很多候选,容易打断思路,另一方面 c++ 本身语法非常复杂,继承、重载等会让选择正确的跳转处变得更加困难, ctags 或 gtags 之类的静态代码分析工具对 c++ 的支持也相当有限。
clang 编译器较之 gcc 在进行代码分析方面提供了良好的支持,编译器给出的结果往往是最正确和最丰富的。
编译数据库(compile_commands.json)里面记录了每一个源代码文件对应的编译命令,有了编译数据库就可以从 clang 编译器获取最详尽的代码分析数据,让代码跳转、自动完成更加精确。
openjdk-12及以上的版本可以采用compile_commands.json导入,这种方式导入可以解决clion采用生成CMakeLists.txt而部分openjdk源码出现头文件无法找到的问题 JetBrains关于Compilation DataBase的介绍:https://blog.jetbrains.com/clion/2020/03/openjdk-with-clion/。
1.2 生成
在openjdk源码根目录执行make命令
- 方法一:make compile-commands
- 方法二:make CONF=macosx-aarch64-server-slowdebug compile-commands 注意:我这里因为是M1芯片,所以用的参数是aarch64,如果是Intel芯片,可以使用make CONF=macosx-x86_64-normal-server-slowdebug compile-commands
1
2
3
4
5
6
7
8
9
10
11
12
13
14
15
16
17
18
19
20
21
22
23
24
25
26
27
28
29
30
31
32
33
34
35
| # 方法一:生成compile-coomands.json
godwit@Firebase ~/Source/openjdk-18+36 make compile-commands
Building target 'compile-commands' in configuration 'macosx-aarch64-server-slowdebug'
Cleaning compile-commands make support artifacts ... done
Updating compile_commands.json
Finished building target 'compile-commands' in configuration 'macosx-aarch64-server-slowdebug'
# 方法二:注意CONF后的参数
✘ godwit@Firebase ~/Source/openjdk-18+36 make CONF=macosx-aarch64-server-slowdebug compile-commands
Building target 'compile-commands' in configuration 'macosx-aarch64-server-slowdebug'
Cleaning compile-commands make support artifacts ... done
Updating compile_commands.json
Finished building target 'compile-commands' in configuration 'macosx-aarch64-server-slowdebug'
# 执行完成,会生成一个compile-commands.json
godwit@Firebase ~/Source/openjdk-18+36/build/macosx-aarch64-server-slowdebug pwd
/Users/godwit/Source/openjdk-18+36/build/macosx-aarch64-server-slowdebug
godwit@Firebase ~/Source/openjdk-18+36/build/macosx-aarch64-server-slowdebug ll
total 12112
-rw-r--r-- 1 godwit staff 1.2K 5 2 23:03 Makefile
-rw-r--r-- 1 godwit staff 2.2K 5 2 23:03 bootcycle-spec.gmk
-rw-r--r-- 1 godwit staff 197B 5 3 16:53 build.log
-rw-r--r-- 1 godwit staff 197B 5 3 16:50 build.log.old
-rw-r--r-- 1 godwit staff 8.9K 5 2 23:03 buildjdk-spec.gmk
drwxr-xr-x 14 godwit staff 448B 5 2 23:05 buildtools
-rwxr-xr-x 1 godwit staff 3.8K 5 2 23:03 compare.sh
-rw-r--r-- 1 godwit staff 5.8M 5 3 15:07 compile_commands.json
drwxr-xr-x 5 godwit staff 160B 5 2 23:03 configure-support
-rw-r--r-- 1 godwit staff 20K 5 2 23:03 configure.log
drwxr-xr-x 3 godwit staff 96B 5 2 23:03 hotspot
drwxr-xr-x 12 godwit staff 384B 5 3 16:16 images
drwxr-xr-x 12 godwit staff 384B 5 2 23:05 jdk
drwxr-xr-x 11 godwit staff 352B 5 3 16:53 make-support
-rw-r--r-- 1 godwit staff 35K 5 2 23:03 spec.gmk
drwxr-xr-x 30 godwit staff 960B 5 3 16:16 support
|
1.3 CLion通过compile_commands.json导入openjdk源码
打开CLion,File→Open→选择文件:
/Users/godwit/Source/openjdk-18+36/build/macosx-aarch64-server-slowdebug/compile_commands.json
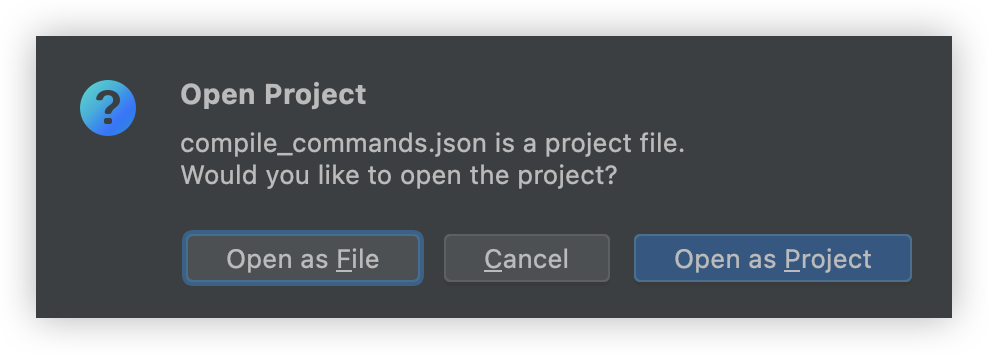
之后CLion会做扫描和index,但是这时候还看不到源码相关的文件和目录,因为此时根目录是/Users/saleson/c-projects/jdk-jdk-16-ga/build/macosx-x86_64-server-slowdebug, 需要更改项目根目录。
操作路径:Tools -> Compilation Database -> Change Project Root
选中openjdk的源码根目录,本文档中的源码根目录是/Users/saleson/c-projects/jdk-jdk-16-ga
CLion再次扫描文件和建立index,结束后就可以看到源码了,且不会提示无法找到头文件
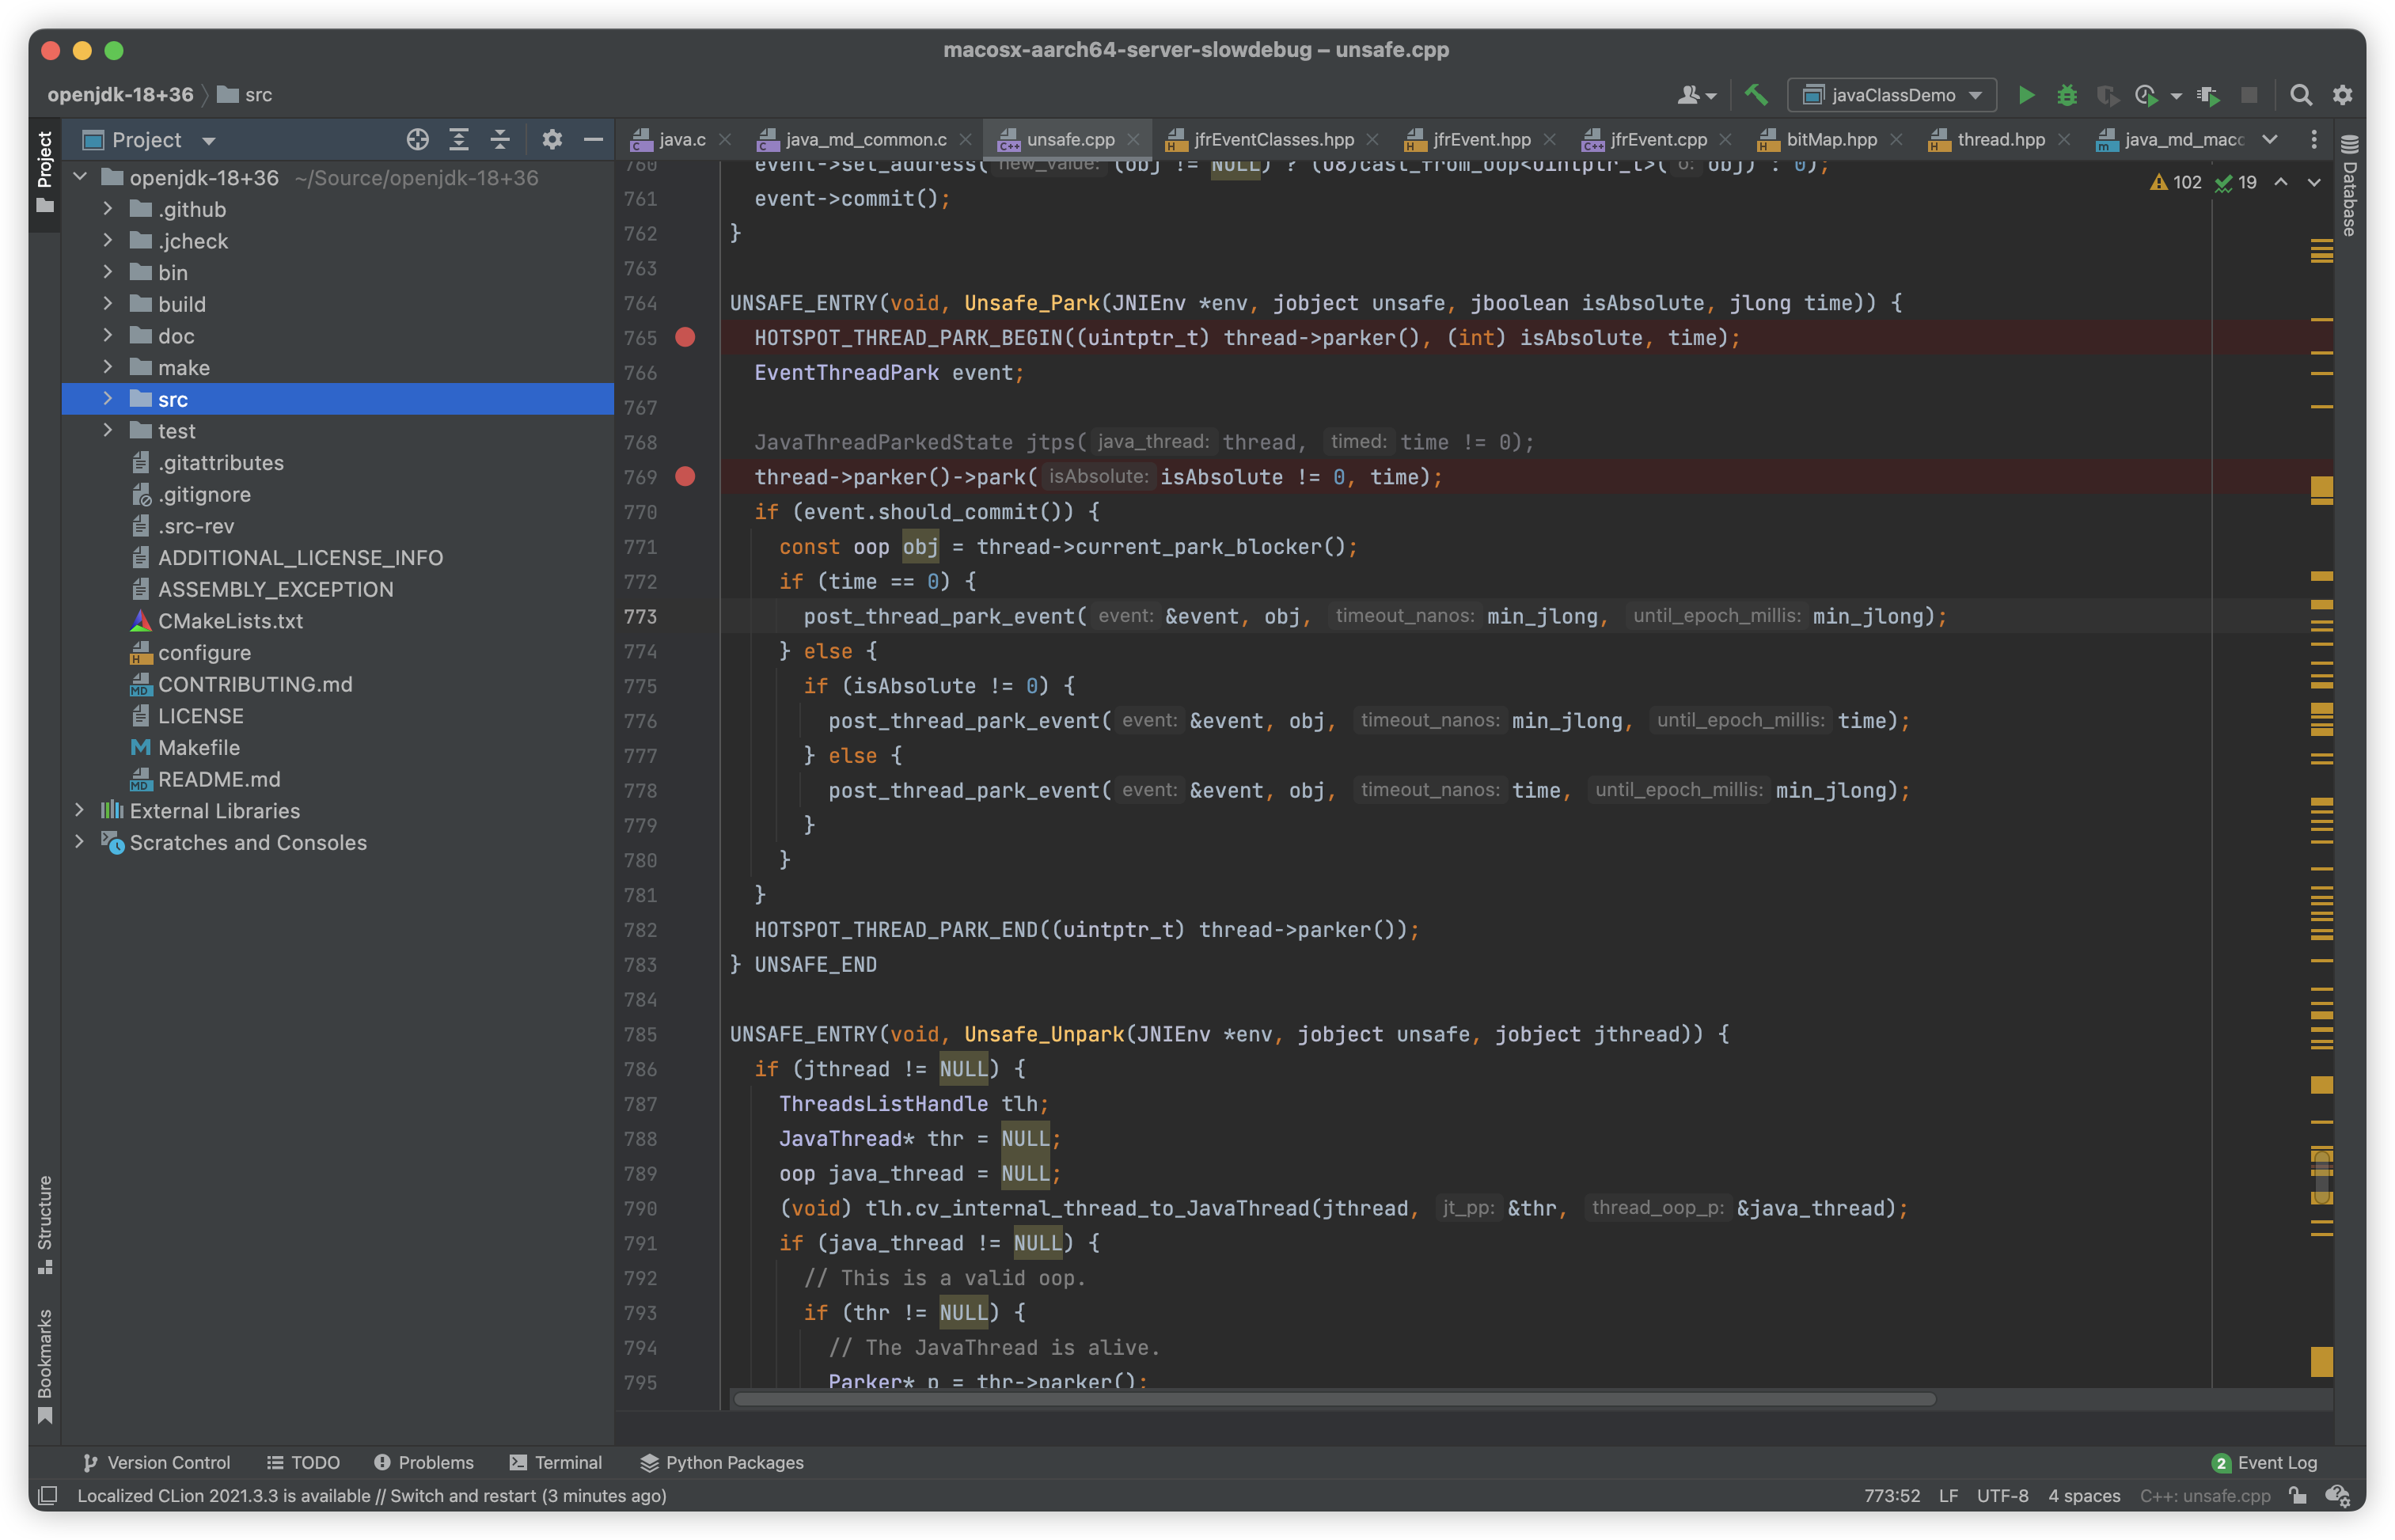
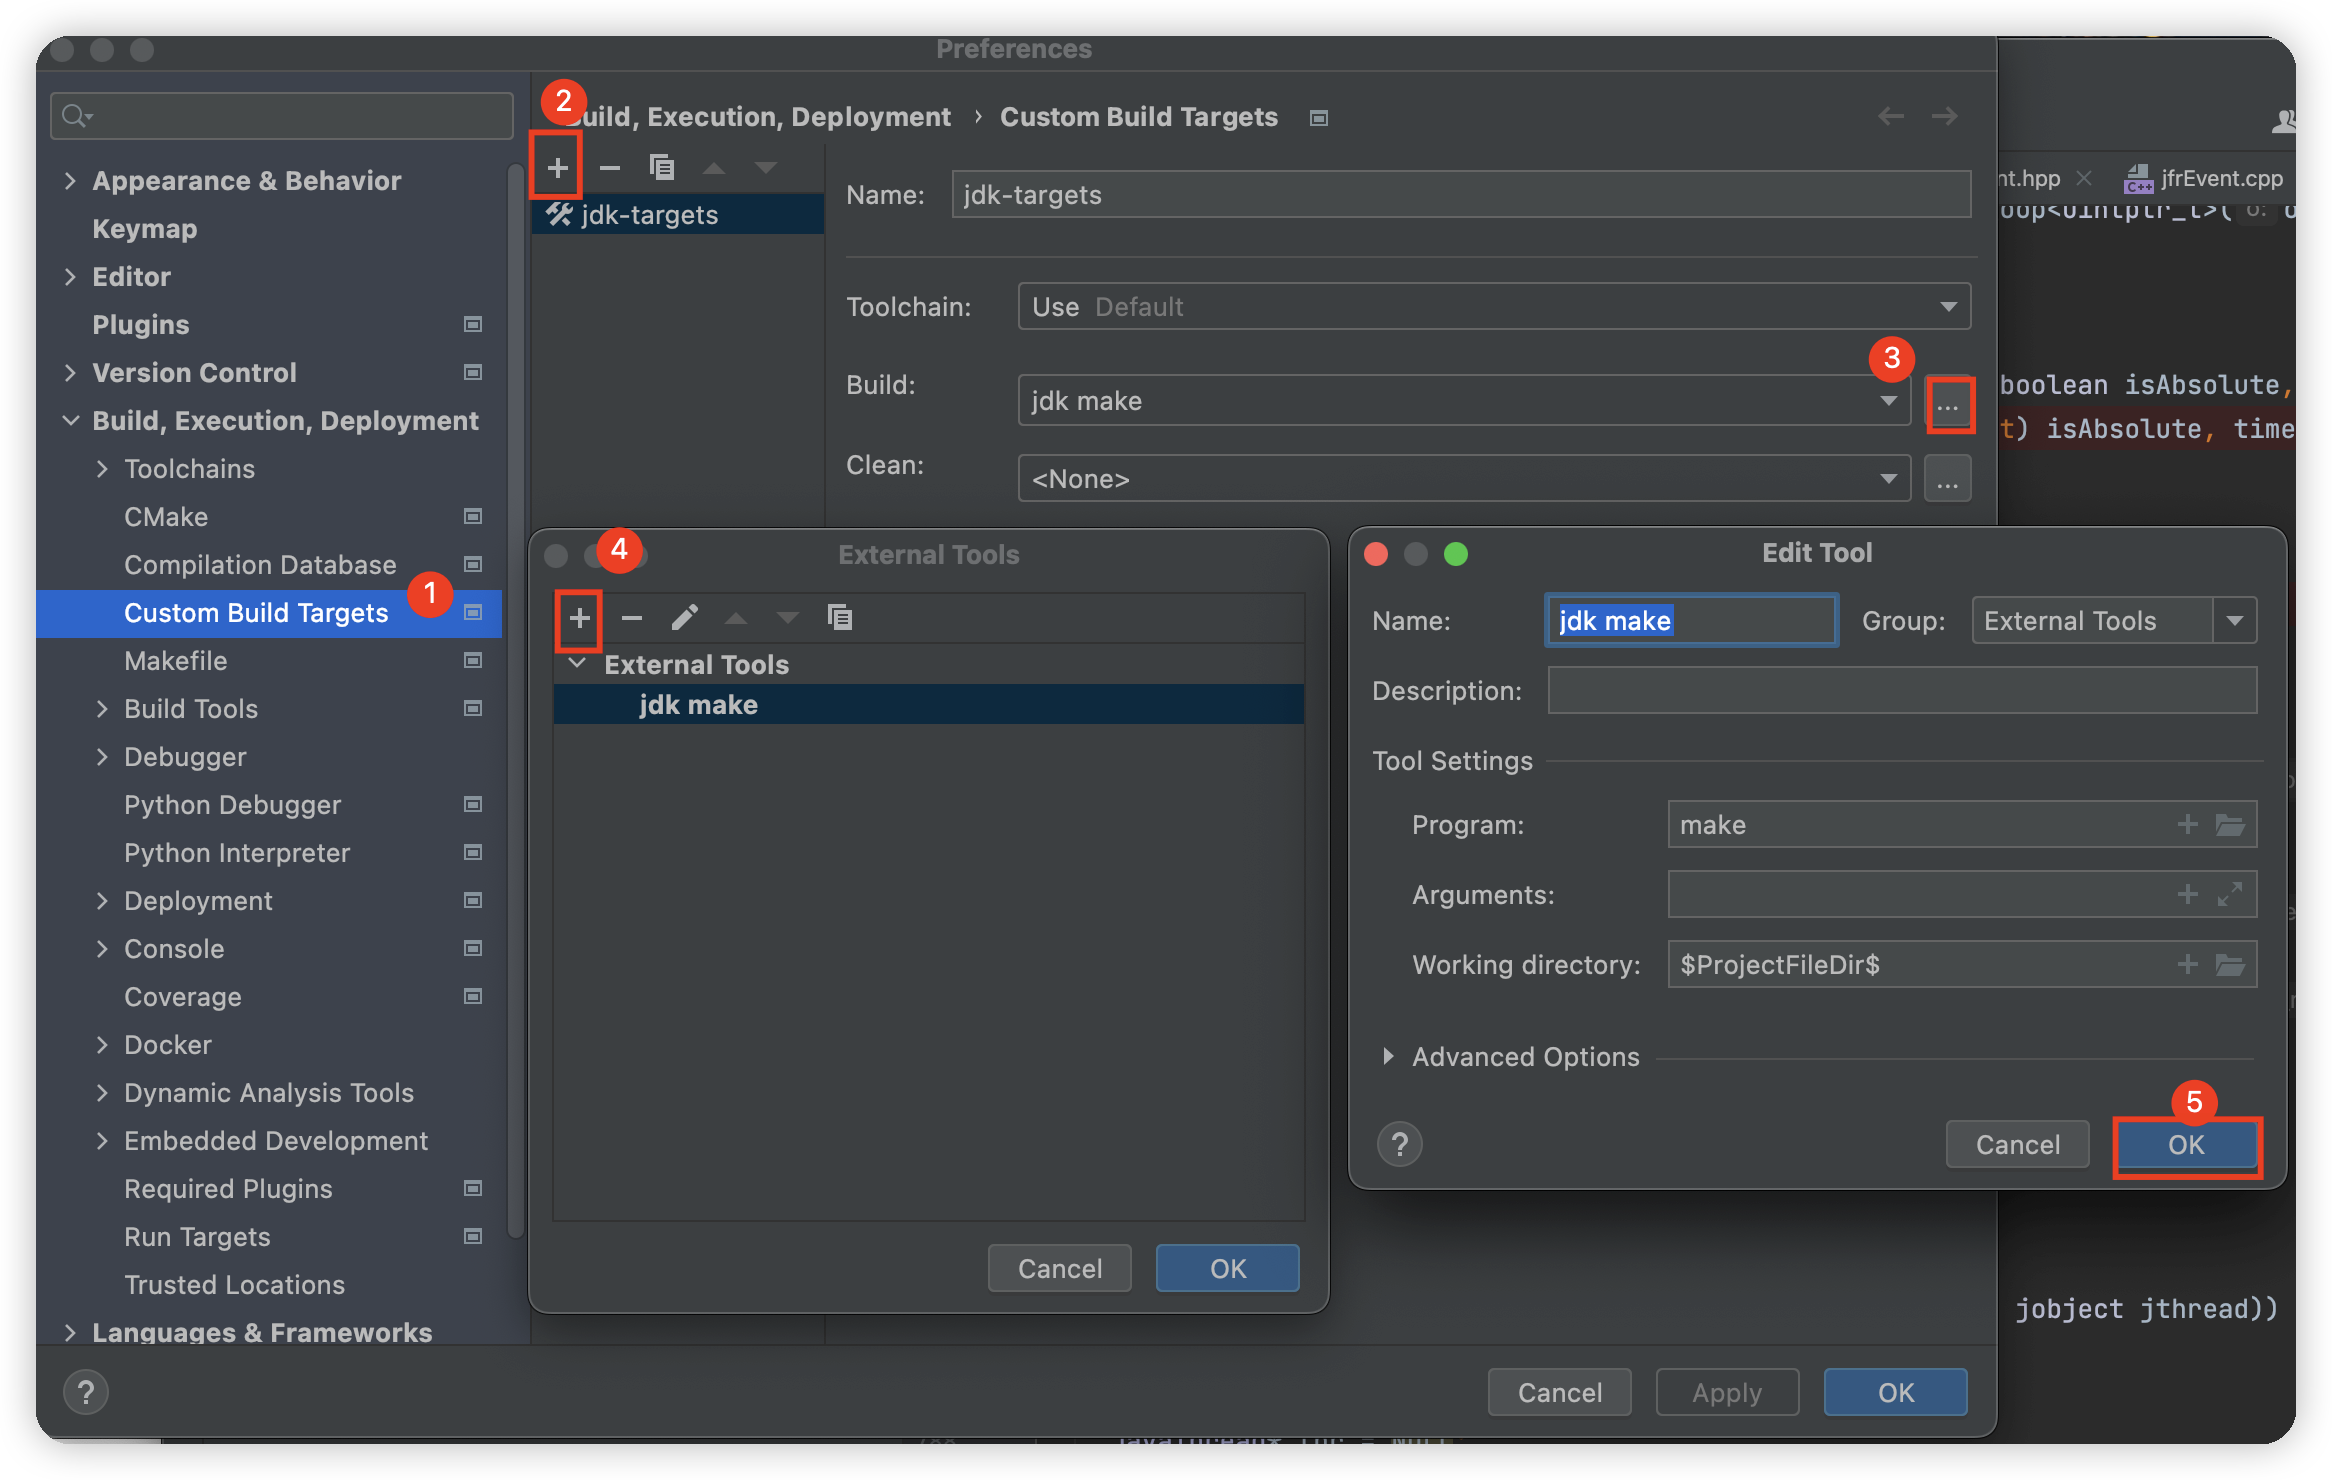
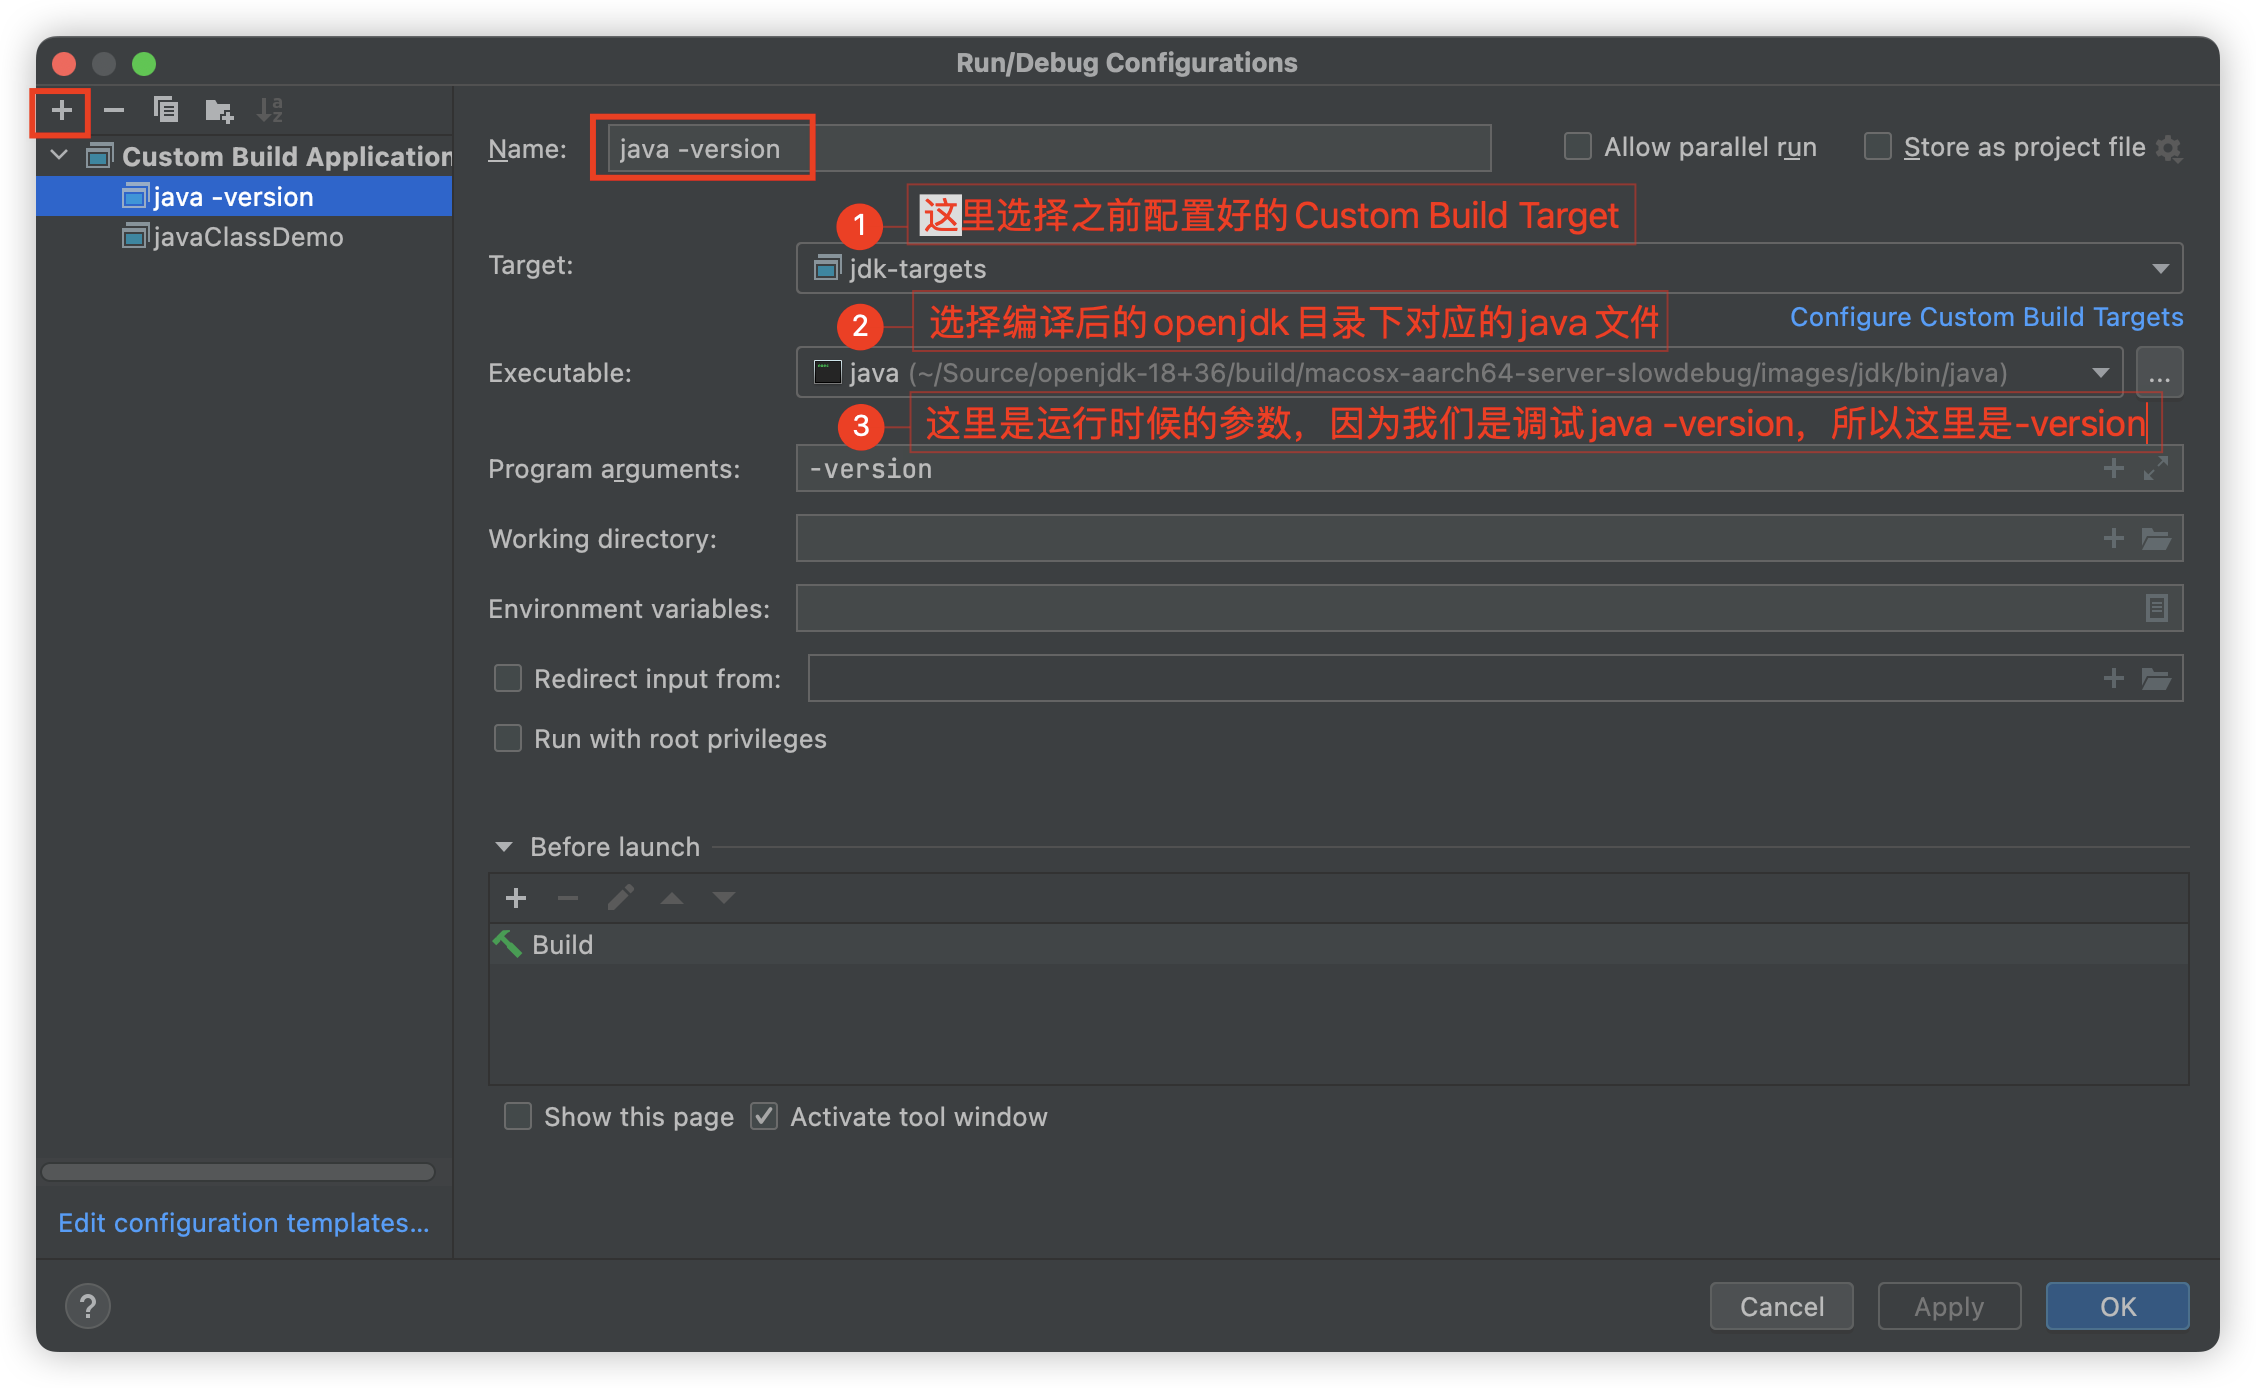
2. 调试配置
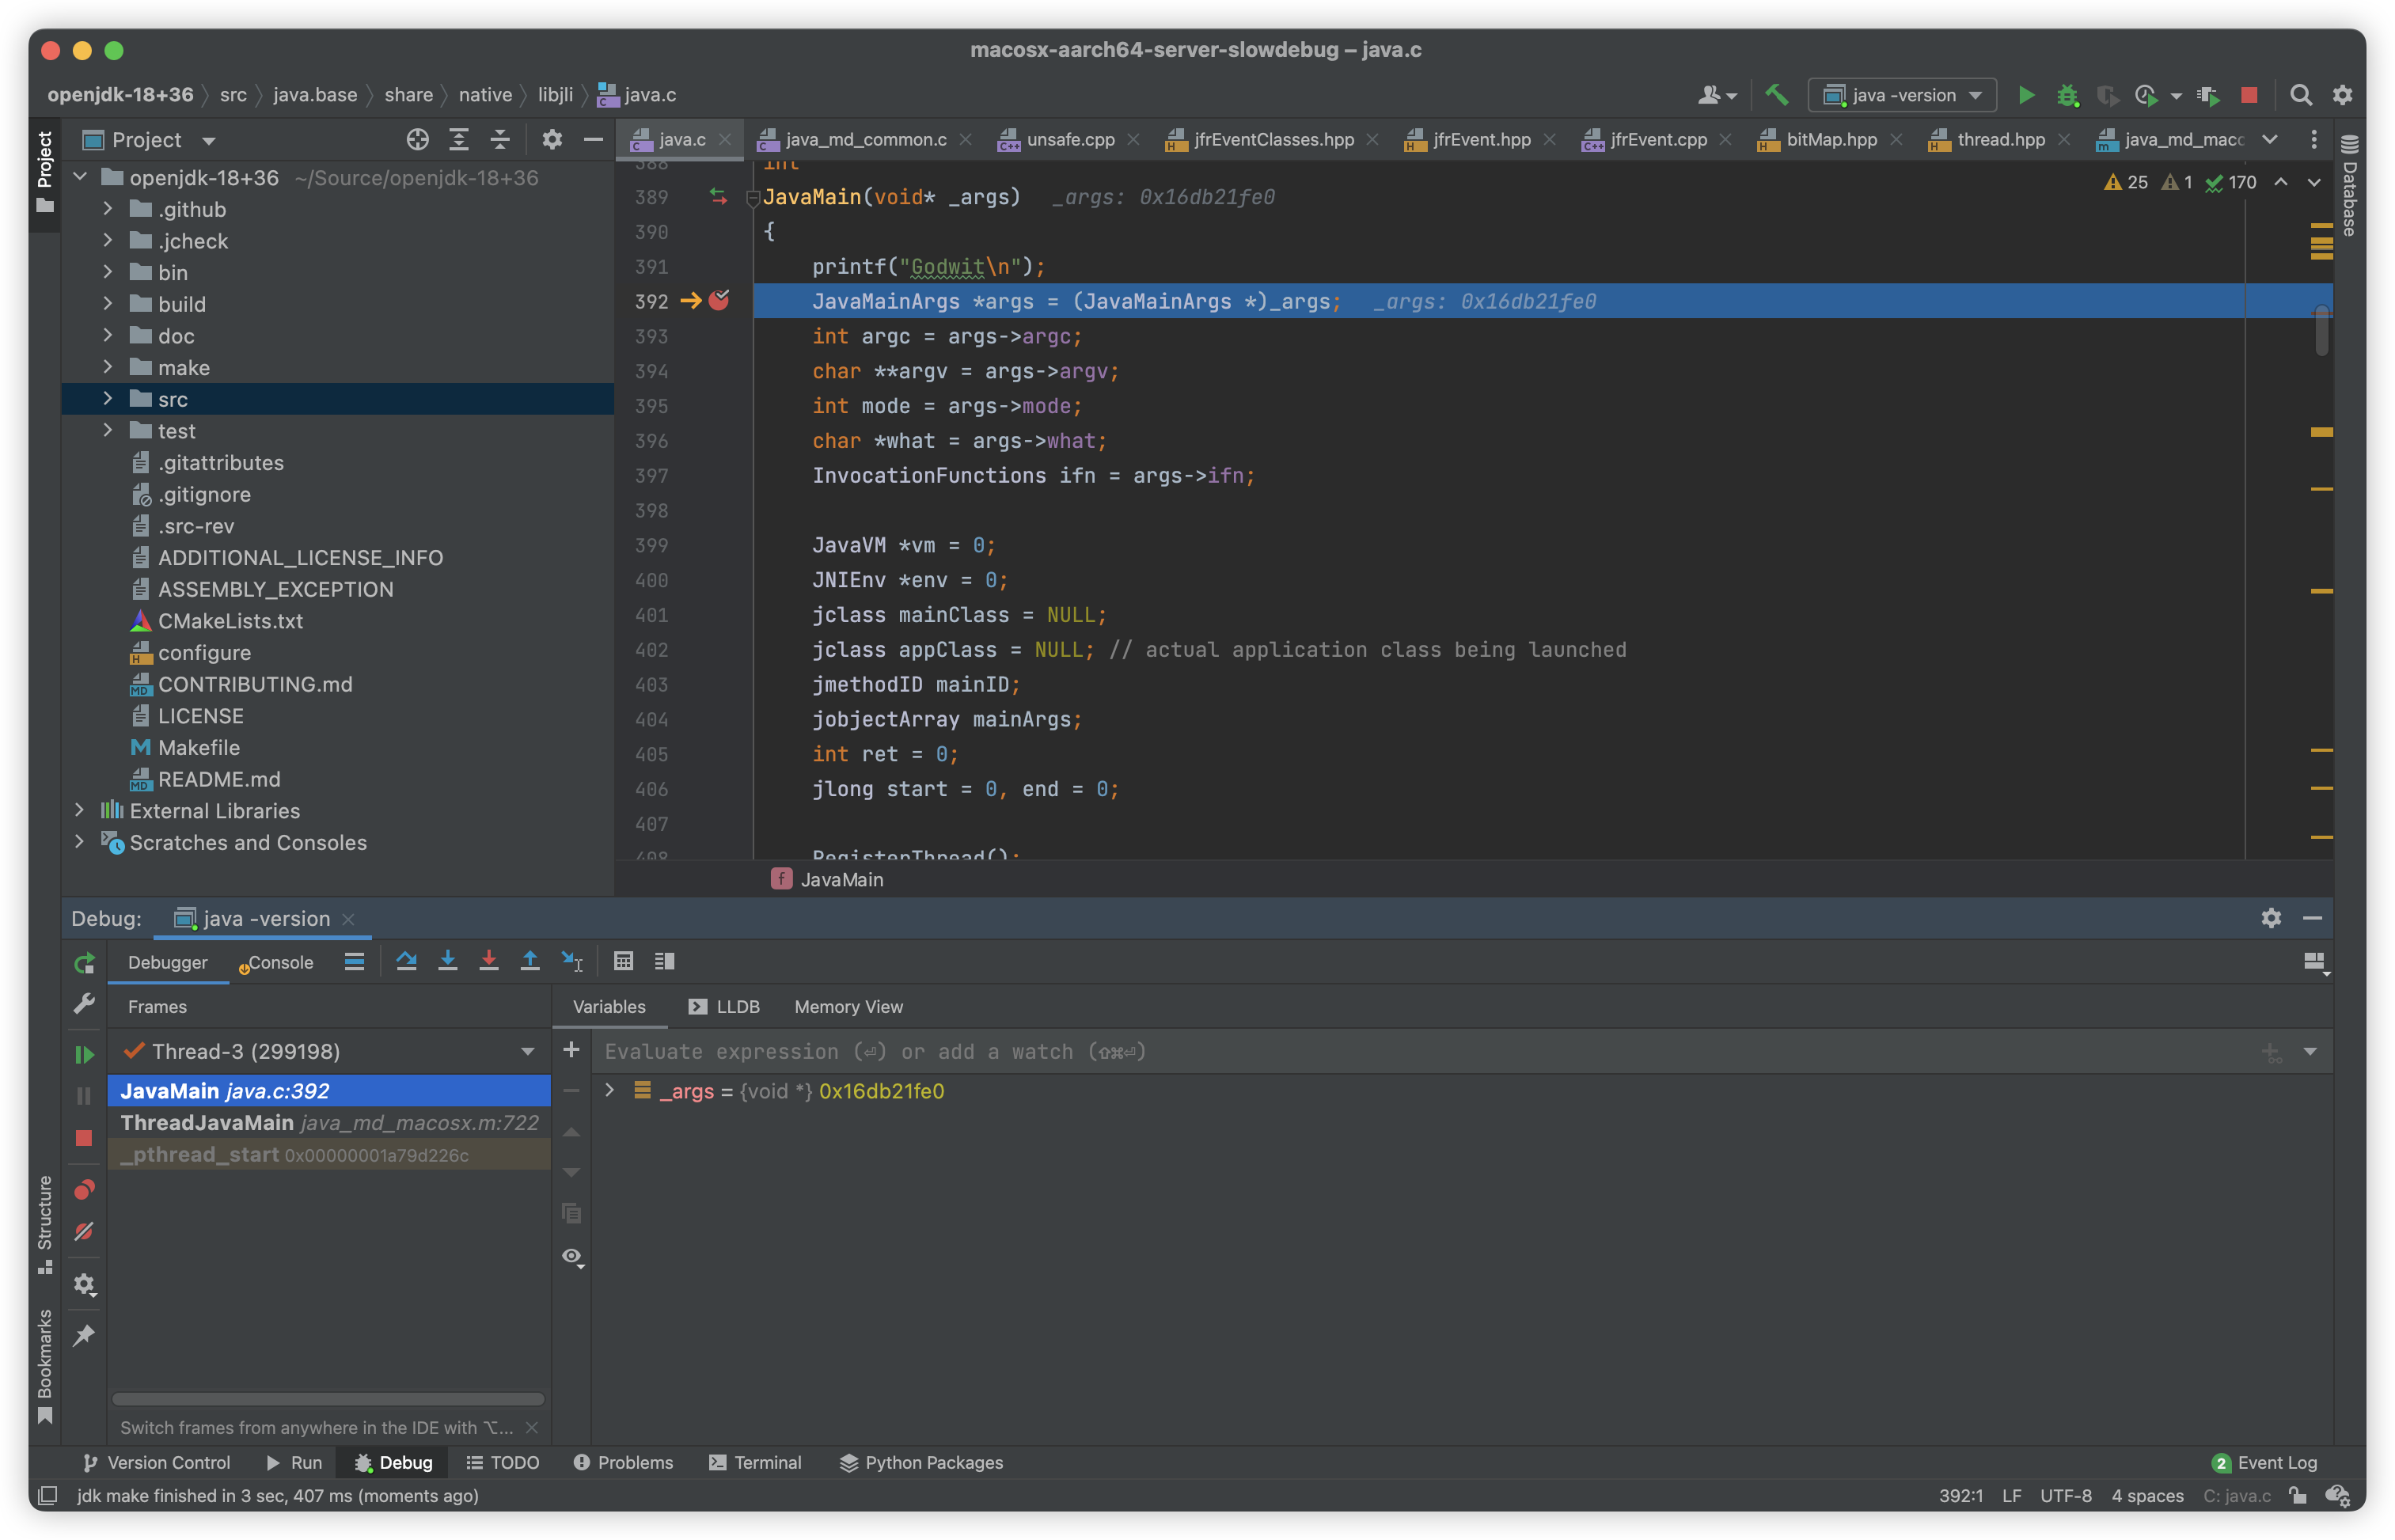
3. 实战一:调试java -version
java.c文件里面的JavaMain函数是入口,再次打上断点,发现断点命中,可以进行调试。
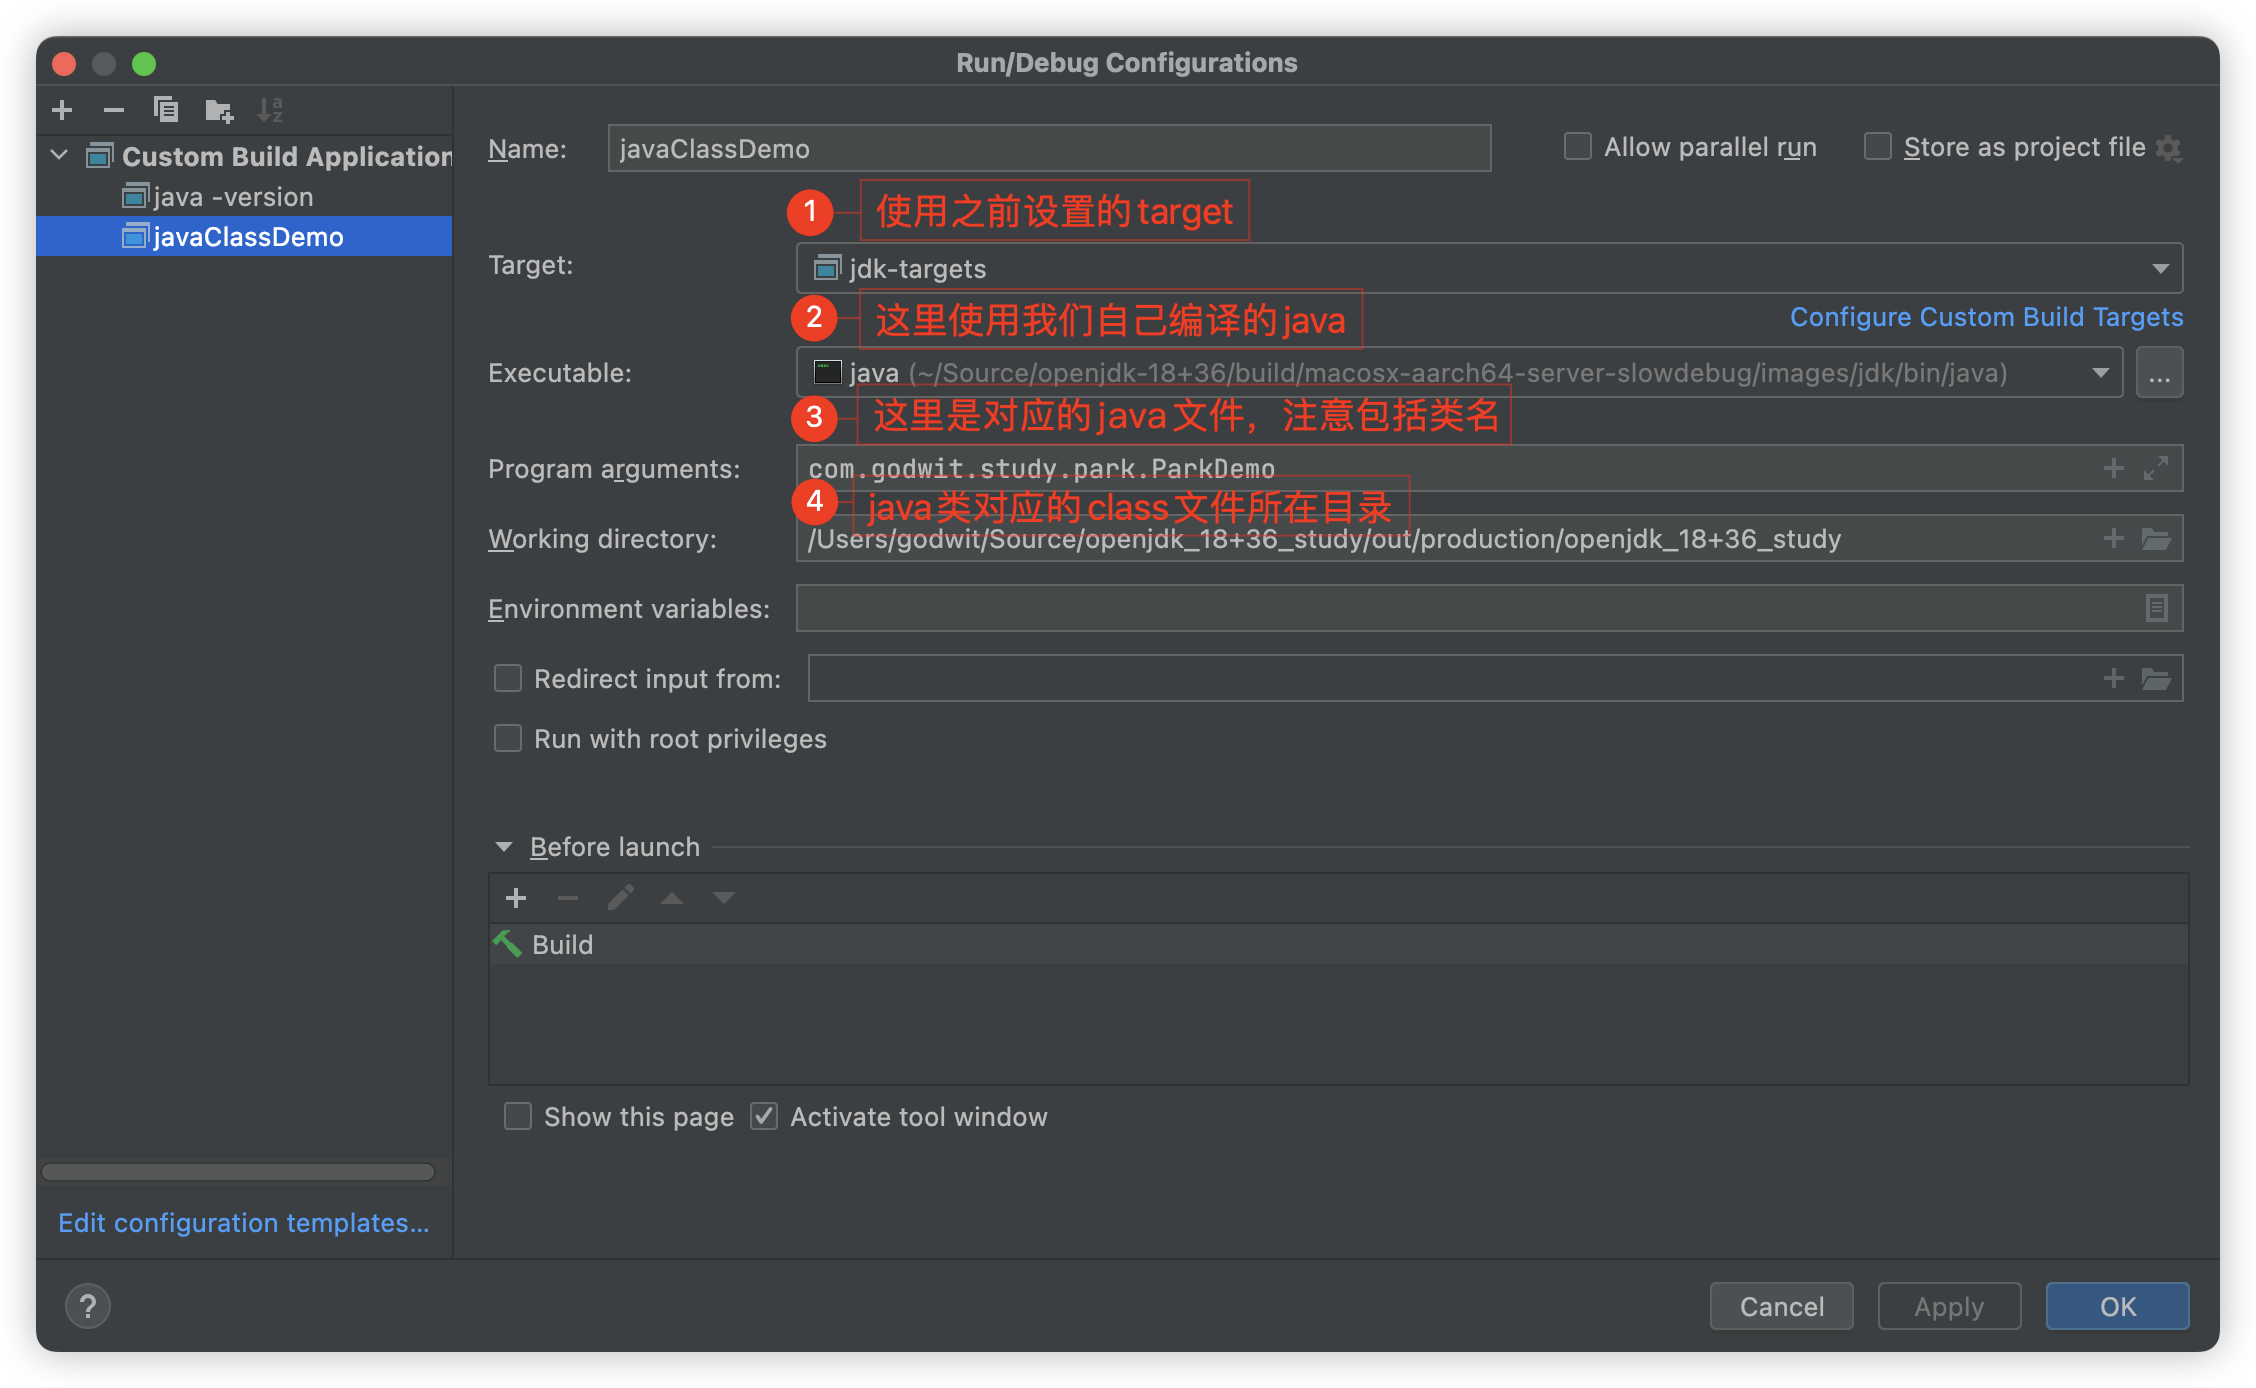
4. 实战二:调试java类
将java文件先编译为class文件。
1
2
3
4
5
6
7
8
9
10
11
| package com.godwit.study.park;
import java.util.concurrent.locks.LockSupport;
public class ParkDemo {
public static void main(String[] args) {
System.out.println("Hello");
LockSupport.park();
}
}
|
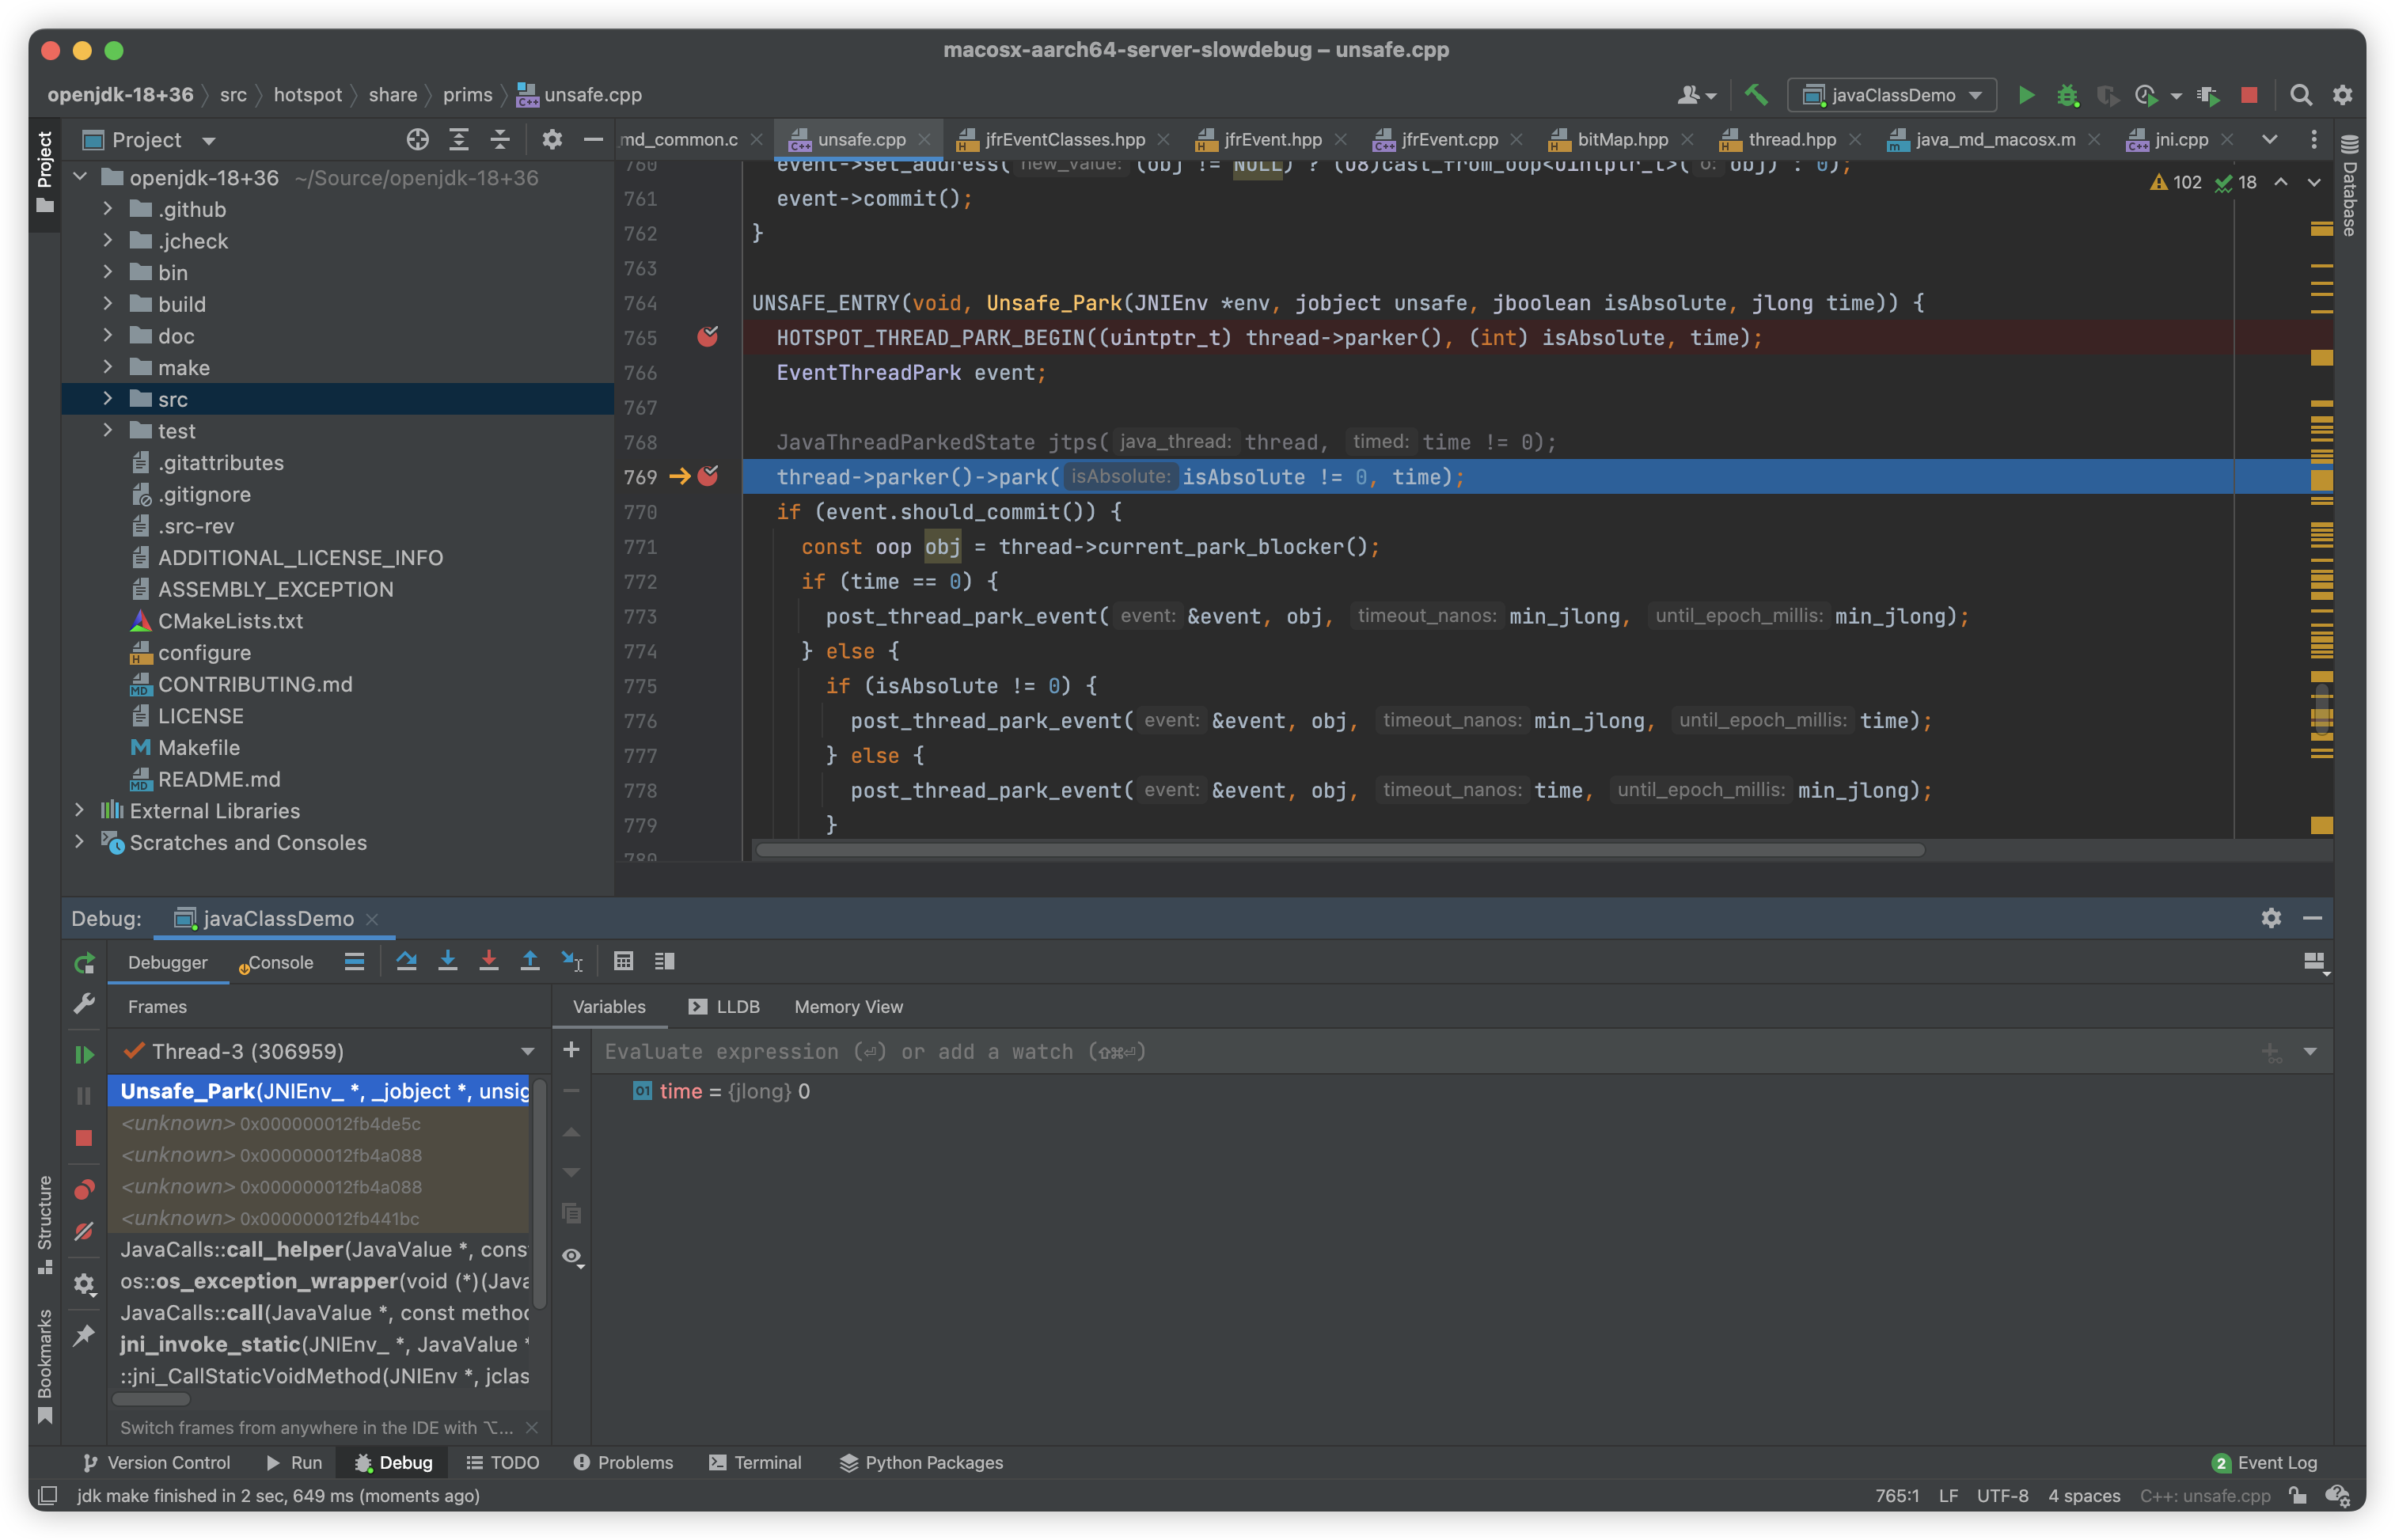
发现断点已经正常中断。
5. 代码修改
我们发现JDK源代码修改之后,再进行Debug,不会生效。如何处理呢?
第一步:源代码路径下执行:make images
1
| godwit@Firebase ~/Source/openjdk-18+36 make images
|
第二步:在CLion中调试,即可生效。
6. 参考链接
https://blog.csdn.net/Mr_rain/article/details/123887310